Help Center Article
Amazon EU Delivery: Creating a Shipment Plan in Amazon Seller Central
See below for instructions on how to create a shipment plan in Amazon Seller Central when you're shipping to an Amazon FBA warehouse in the EU with Flexport.
Amazon EU Delivery: Creating a Shipment Plan in Amazon Seller Central
For how to create a shipment plan for Amazon US/Canada see Amazon US/Canada Delivery: Creating a Shipment Plan in Amazon Seller Central.
To get started:
1. Select the products you want to ship on the Manage Inventory page.
Note: Put all SKUs you want to ship in one shipment plan. Shipment plans do not need to be broken down by SKU. If you break them down by SKU, Amazon may split your shipment into more fulfillment centers than necessary.
2. Select Send/Replenish Inventory from the drop-down menu.
3. Select Create new shipping plan.
4. Choose your Ship From address:
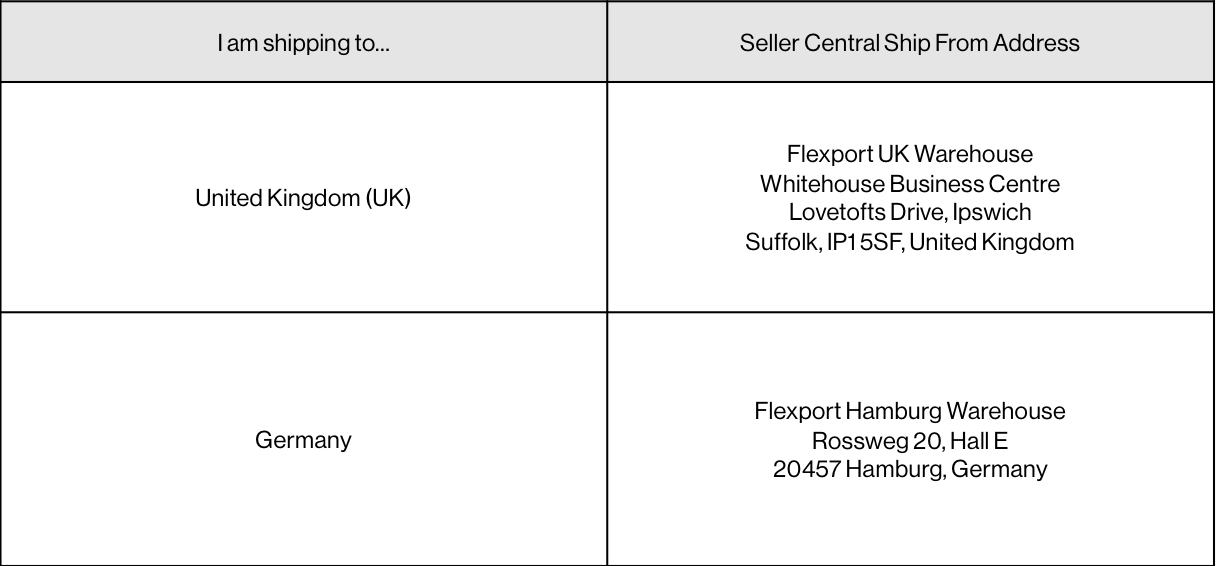
Note: The Ship From address is the Flexport warehouse from which your shipment will be picked up for final delivery to an Amazon fulfillment center. The location of the warehouse you select often determines the location of the Amazon fulfillment center you're assigned. DO NOT USE THE SUPPLIER'S ADDRESS.
Choose a Ship From address using the table below:

5. Click Continue to shipping plan.
Follow steps 1-3 on Amazon's Shipment Creation Process.
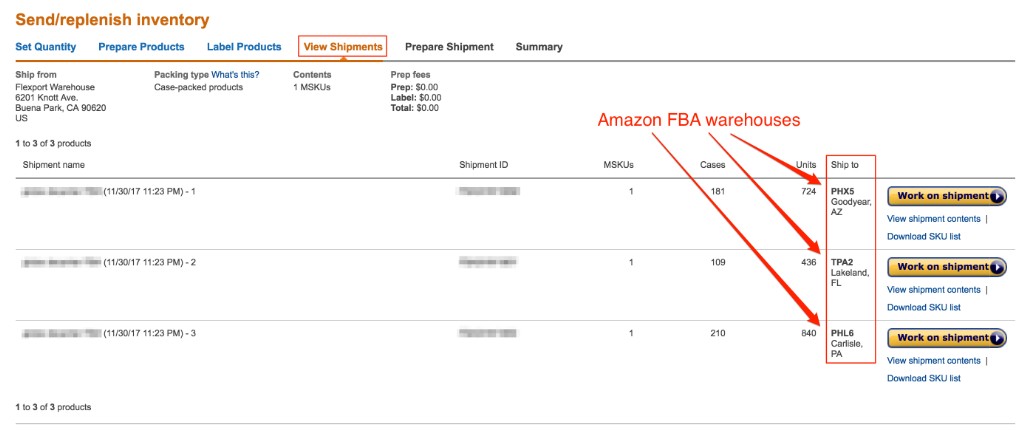
On step 4, the Review Shipments page, you will be assigned a fulfillment center, or multiple fulfillment centers.

2. Review the details of your shipment plan before you review it. After you approve the shipment plan, very few details can be changed.
3. Approve the shipment plan. After the plan has been approved, the page will change from Review Shipments to View Shipments.
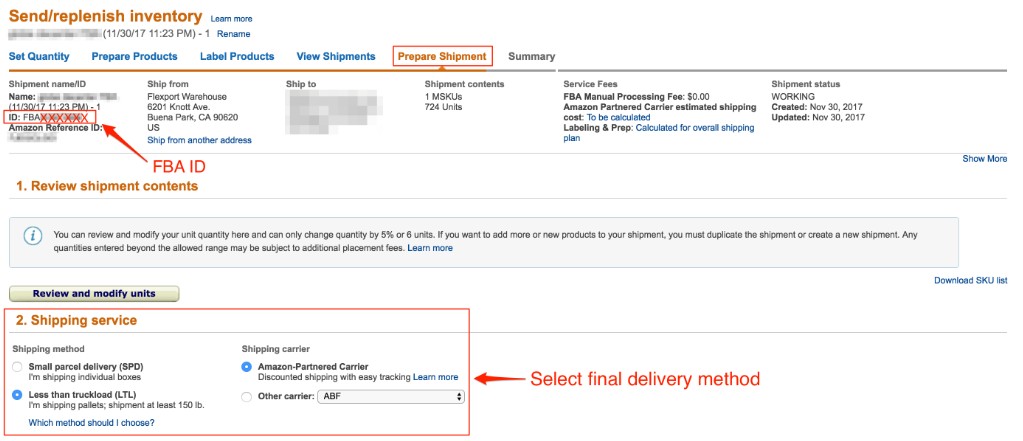
After creating you shipment plan, you will be directed to the Prepare Shipment page.
The Prepare Shipment page is where you will need to select your final delivery method, shown below.

You will have a different FBA shipment ID for each fulfillment center you are assigned.
